

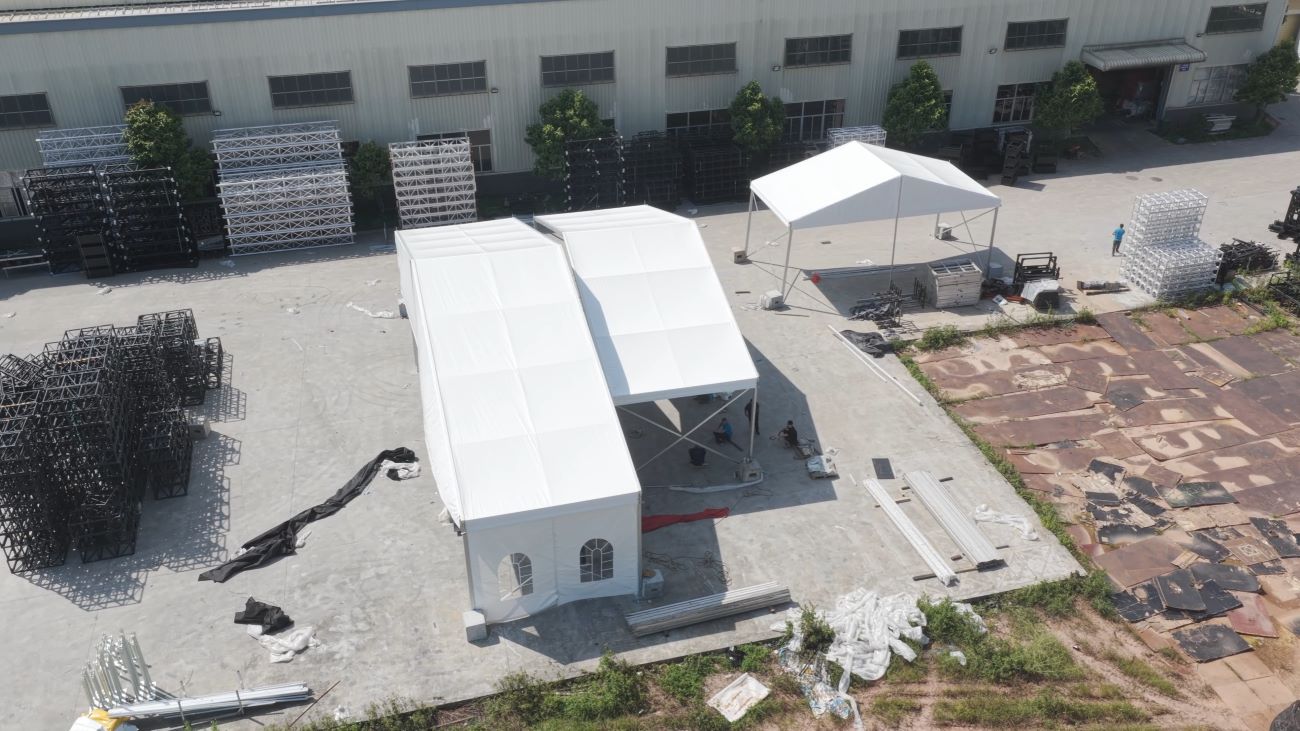
How to Install an Outdoor Event Tent: Practical Frame Assembly and PVC Cover Installation
Outdoor event tent installation is not only a matter of connecting aluminum profiles and pulling a PVC cover over the roof. A smooth installation depends heavily on preparation, correct sequencing, and knowing which jobs should be completed while the structure is still on the ground.
This installation was carried out as a real temporary setup using our aluminum event tent system. The full process was recorded from the first frame connections through roof covering, sidewall installation, and final completion. Rather than turning the video into a long list of small actions, this guide focuses on the parts that actually make the installation easier, faster, and more controlled.
Several of the details shown here come from practical installation experience. They may look simple in the video, but they can save a surprising amount of measuring, repositioning, and difficult work after the frame has already been raised.
1. Prepare the Ground Layout Before Raising the Main Columns
One of the most useful parts of this installation happens before the tent is standing.
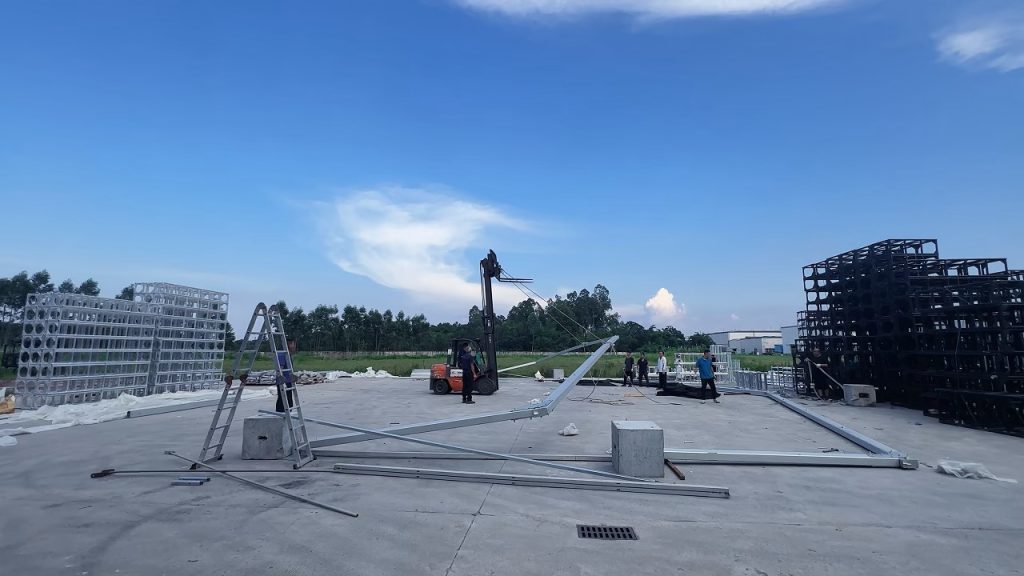
The main frame components are first arranged on the ground, and the connection points are prepared while workers can still reach them easily. At this stage, the positions of the two main columns also need to be controlled.
In the video, a horizontal tie bar is placed on the ground between the two column positions. This is not simply a loose part waiting to be installed later. It is used as a practical spacing reference for the two main columns.
Once the correct tie bar is positioned, the distance between the two columns is already determined by the component itself. The installation team does not need to measure the same spacing again with a tape measure.
This becomes especially important when the frame is lifted. Once the main columns are upright, the structure needs to be stabilized quickly. If the spacing has already been established on the ground, the workers can connect the stabilizing members immediately instead of stopping to measure and adjust the two columns while they are standing.
The same idea applies to the cross bracing that can be assembled or positioned in advance. Any bracing that can reasonably be prepared on the ground should be prepared before the main frame is raised.
Practical installation principle:
Complete as much positioning, connection preparation, and bracing work as possible while the structure is still at ground level.
It reduces work at height and makes the next stage much more efficient.
2. Assemble the Main Aluminum Frame and Connection Points on the Ground
The main roof frame is assembled section by section on the ground.
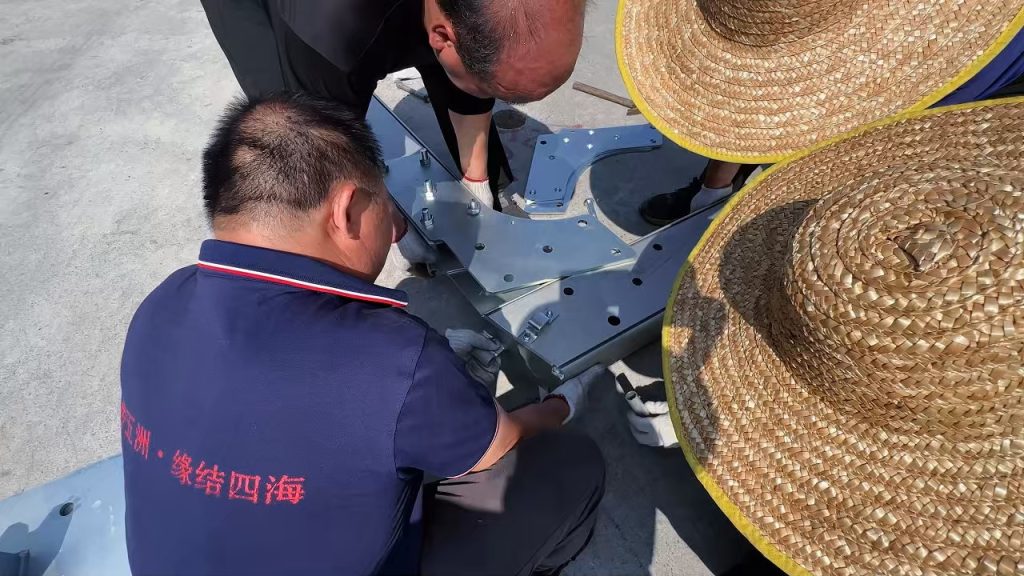
During this stage, the workers align the aluminum profiles and install the main connection hardware before the structure is lifted. Working at ground level gives the installation team better access to both sides of each joint and makes it easier to confirm that the profiles are properly seated.
The video also shows several close views of workers checking and tightening connection areas. These small operations are easy to overlook once the whole tent is standing, but they matter.
A connection that is slightly misaligned at ground level may become much more inconvenient to correct after the frame has been lifted several meters into the air.
For this reason, the sequence is not simply:
connect the frame -> raise it -> fix everything later.
A better sequence is:
layout -> align -> connect -> check -> prepare bracing -> raise.
This is one of the reasons experienced installation teams can work faster without appearing rushed. More of the difficult decisions are made before the structure leaves the ground.
3. Raise the Frame in a Controlled Way and Stabilize It Immediately
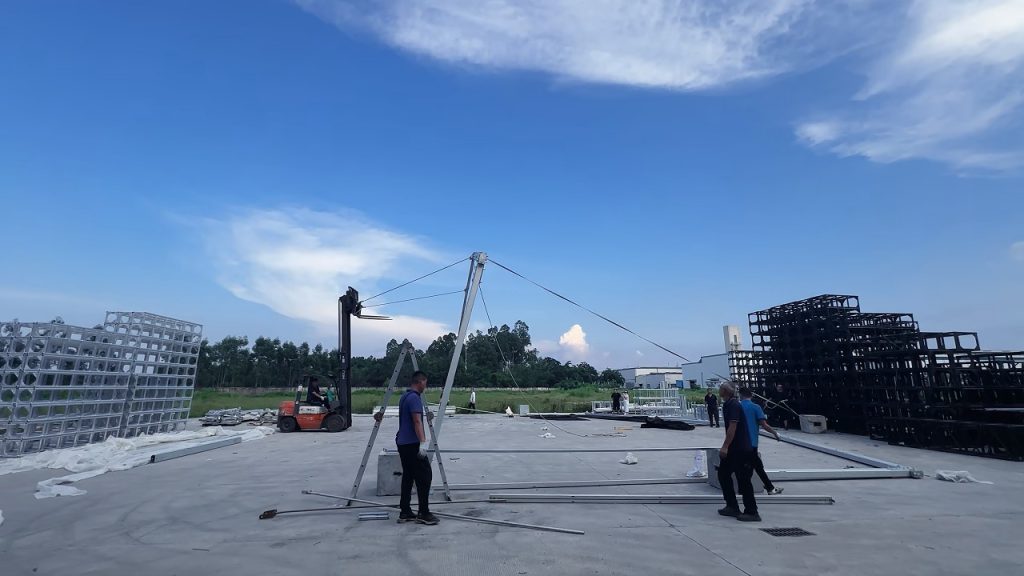
For this temporary installation, a forklift was used to assist with raising the main frame.
Before lifting begins, the lifting ropes need to be arranged carefully. In this setup, the ropes on the two lifting sides were kept at nearly the same effective length. This helps the frame rise more evenly. If one side is noticeably longer than the other, the frame can tilt during lifting, making the movement much harder to control and increasing the risk on site.
Rope length also matters. Leaving the lifting ropes unnecessarily long means the forklift needs more lifting height and more working space before the frame can reach the required upright position. On a site with limited operating space, excessive rope length can make it difficult for the forklift to raise the frame through the full lifting movement.
Another practical detail is what happens after the frame is upright. For this temporary setup, the lifting ropes were arranged so they could be released efficiently after the frame had reached position and had been stabilized. This avoids turning rope removal into another difficult high-level operation. Any rope, sling, attachment point, and connection method used for lifting must still be suitable for the actual frame weight and lifting plan; a quick-release arrangement should never replace a properly rated and secure lifting connection.
As the frame begins to rise, one worker can be seen controlling it from the opposite direction. This is an important detail.
The worker is not simply helping the forklift lift the frame. His job is to help control the direction of the structure and reduce the tendency of the frame to fall or lean toward the forklift side during the lifting movement.
When a large frame changes from a horizontal position to a vertical position, its center of gravity changes continuously. The installation team therefore needs to consider the lifting points, the effective rope lengths, the forklift position, the available lifting height, and the direction of frame movement together rather than simply trying to pull the structure upward.
Once the columns reach the upright position, the previously prepared tie bars and cross bracing can be connected quickly. This is exactly why those parts were prepared earlier.
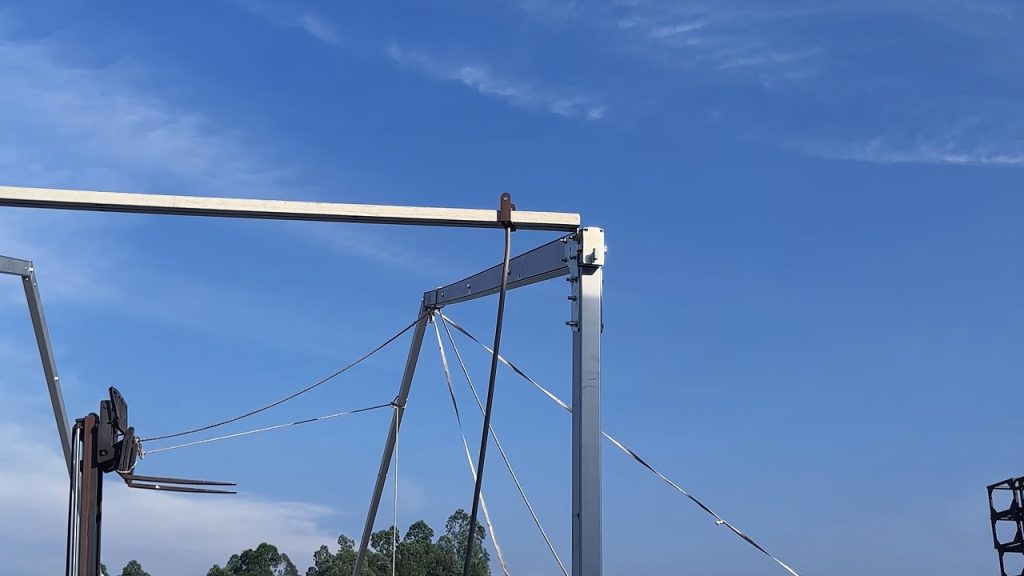
The frame should not be left standing loosely while workers start searching for braces, checking measurements, or moving components into position.
The faster the first stable geometry is established, the more controlled the next installation work becomes.
Another practical detail can be seen when the second main column frame is raised. In addition to the main lifting ropes, two extra control ropes are attached around the middle area of the frame. These ropes are kept available after the frame has been raised because the final distance and alignment between the two upright frames may still need adjustment before the horizontal connecting members can be installed.
If the two upright frames are too far apart, the workers can use the control rope on the required side to pull the frame slightly closer. If the alignment needs to move in the opposite direction, the other rope can be used instead. This gives the installation team a simple way to fine-tune the relative position of the raised frames before connecting the horizontal members.
This preparation is especially useful because trying to correct the spacing only after the frames are standing can be difficult. Keeping control ropes available gives the crew an adjustment method from the ground instead of relying only on pushing or repositioning the upright structure at the connection point.
These control ropes are for positioning and controlled adjustment during the installation sequence. Their use should be coordinated with the lifting and stabilization plan, and workers should not treat them as a substitute for the structural bracing or final anchoring system.
4. Forklift for a Temporary Setup, Crane for More Convenient High-Level Work
The forklift shown in this project was suitable because this was a temporary setup and the required equipment was already available on site.
However, for a larger project or a site where a suitable mobile crane is available, using a crane can make the high-level installation work much easier.
This is an important practical point for event contractors and installation teams.
With suitable lifting equipment, workers can position and support the frame more conveniently while installing upper tie members, roof components, connection hardware, and other parts around the top of the structure.
Without suitable lifting access, some upper-level work can become awkward. Workers may need to reach across the roof frame or work from positions that are much less convenient.
Using appropriate lifting equipment can therefore provide two clear benefits:
1. It reduces the physical difficulty of high-level installation.
2. It can improve the overall safety and control of the work.
The exact lifting method should always be selected according to the tent size, site conditions, available equipment, and the installation plan. A forklift may be practical for a controlled temporary setup like the one shown here, while a crane is often a better choice when the project scale and site conditions justify it.
5. Connect the Roof Structure Before Installing and Tensioning the PVC Cover
After the main frames are upright and stabilized, the longitudinal roof members are connected to form the complete roof structure.
At this point, the installation begins to change visually from a series of individual aluminum frames into one continuous tent structure.
The roof members do more than provide support for the PVC cover. They also connect the individual frame sections together and help form the final geometry of the tent.
Before installing the PVC roof cover, the team checks that the roof structure is continuous and that the main members are correctly positioned.
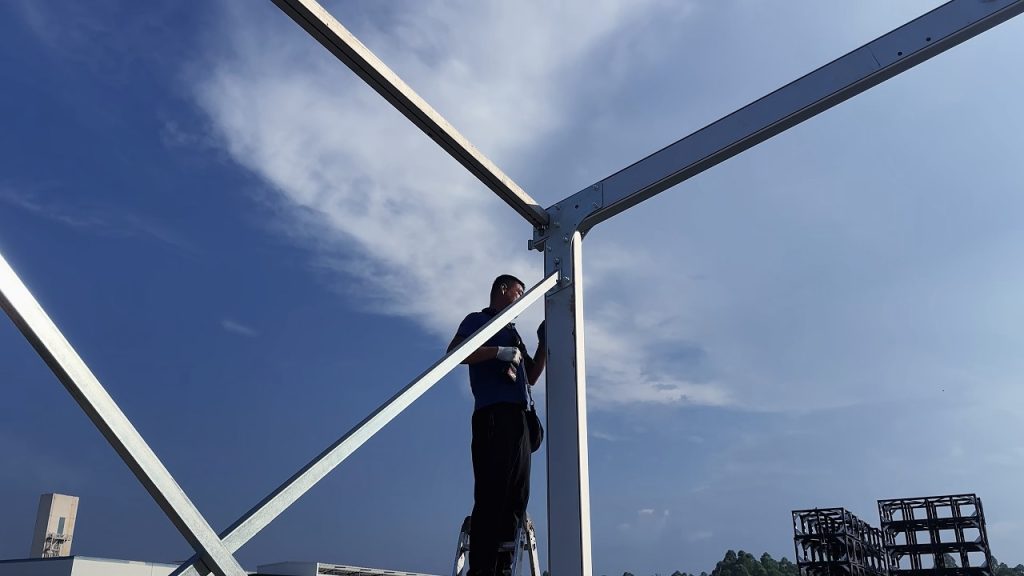
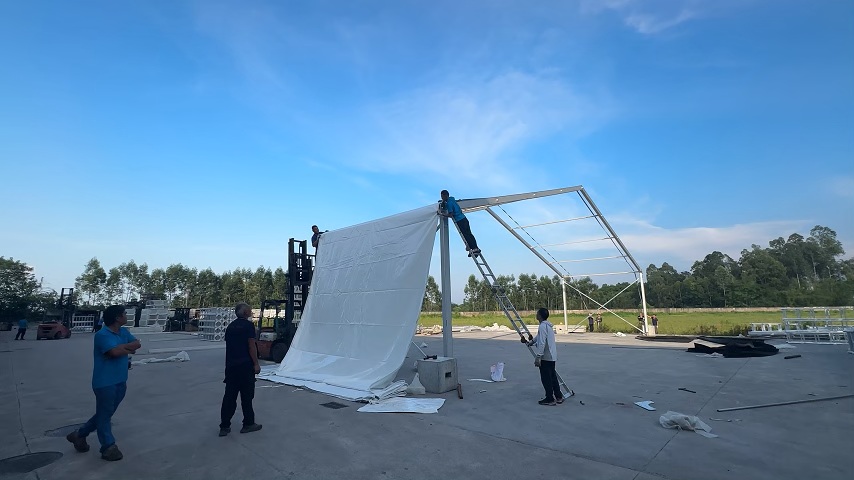
The PVC cover is then lifted and pulled over the roof section.
This part of the work is easier when the cover is first positioned carefully rather than immediately pulled tight from one corner. The workers gradually move the fabric into the correct location and then secure it along the frame.
A good roof installation should avoid obvious loose areas while also keeping the cover aligned with the roof geometry.
Correct tension helps the PVC surface remain smooth and reduces areas where rainwater could collect.
The video shows workers repeatedly adjusting and fastening the roof edge instead of treating the cover as a single one-step operation. That is normal. Final tension is achieved through a series of adjustments around the structure.
A simple practical check can be seen in the installation video: after the PVC roof cover has been tightened with the tensioning system, the worker taps the surface of the PVC by hand. He is not doing this casually. The response of the material gives the installer a quick indication of whether the roof cover has reached sufficient tension.
If the PVC still feels loose and soft, with little resistance or rebound when tapped, the roof cover may require further tensioning. When the cover is properly tensioned, the surface becomes noticeably firmer and responds with more rebound. This hands-on check gives an experienced installer immediate feedback before moving on to the next section.
This check is important for more than appearance. A loose roof cover can form low areas where rainwater collects. On a large event tent, accumulated water adds unwanted load high above the ground and can also make later drainage or correction difficult. Maintaining appropriate roof tension helps the rainwater follow the designed roof slope and drain away instead of remaining on the PVC surface.
The hand-tap method is a useful practical field check, but it should be treated as an installer’s quick assessment rather than a substitute for the tent manufacturer’s specified tensioning, structural, drainage, anchoring, and weather-safety requirements.
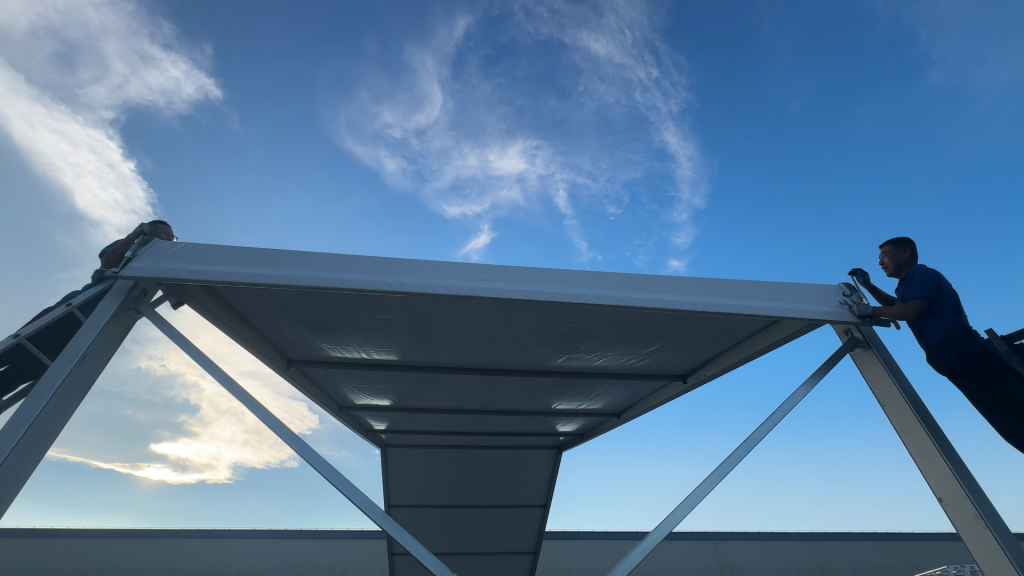
6. Finish the Roof Edges, Bracing, and Sidewall Connections
Once the main PVC roof is in position, attention moves to the edges and the remaining structural details.
Workers continue securing the roof cover around the perimeter and checking the connection between the PVC material and the aluminum frame.
The side bracing and lower structural members are also important at this stage. The tent is already standing, but that does not mean the installation is finished.
A completed event tent depends on the whole system working together:
– main aluminum frames
– longitudinal roof members
– diagonal bracing
– lower connecting members
– PVC roof cover
– sidewall system
– base and anchoring arrangement
The video later shows the sidewalls being installed, including wall panels with clear window sections.
Sidewalls are installed only after the main roof structure is stable and the upper cover has been properly positioned. This keeps the installation sequence logical and prevents the wall panels from getting in the way during major structural work.
7. Install the Sidewalls and Complete the Final Adjustment
The final stage is not simply hanging the sidewalls and walking away.
Each sidewall needs to be aligned with the vertical frame and secured along its edges. The lower section also needs to sit correctly so that the wall does not twist or remain uneven.
As the side panels are added, the tent changes from an open aluminum roof structure into a complete enclosed event space.
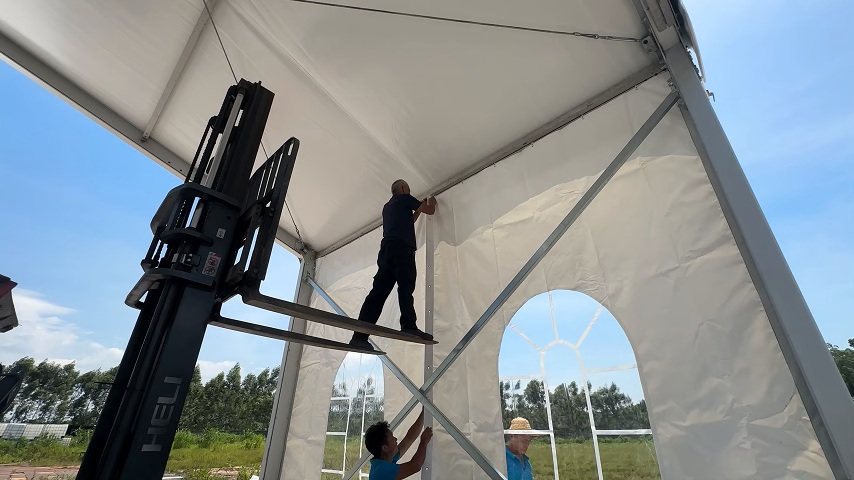
At this stage, the installation team should make a final visual and mechanical inspection of the complete system.
Typical points to check include:
– whether the main columns remain correctly aligned
– whether the ground tie members and cross bracing are secured
– whether the roof frame connections are fully installed
– whether the diagonal braces are correctly positioned
– whether the PVC roof has even tension
– whether the roof edges are properly secured
– whether the sidewalls are aligned and fixed
– whether the base and anchoring or ballast system is correctly arranged
In this temporary setup, concrete blocks were used around the base area during the installation process. The final anchoring or ballast solution for any real event project should always be selected according to the actual tent system, ground conditions, weather requirements, engineering requirements, and local safety rules.
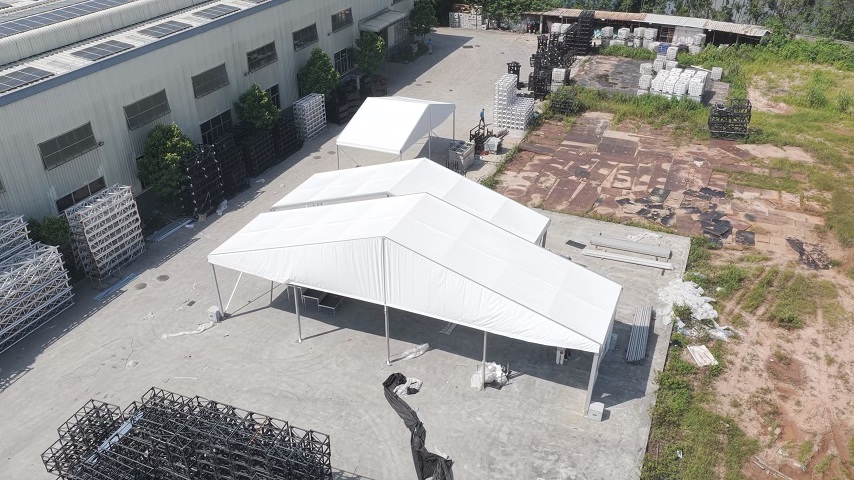
The Small Details That Save Time During Event Tent Installation
The most useful lesson from this installation is not a single special tool or complicated technique.
It is preparation.
The ground tie bar used to establish the distance between the two main columns is a good example. It replaces repeated measuring at exactly the moment when the installation team needs to work quickly.
Pre-positioning the cross bracing is another example. The brace may only take a short time to install, but having it ready before the columns are raised means the structure can be stabilized immediately.
Controlling the frame from the opposite direction while the forklift lifts it is another small action that has a clear purpose.
These details are usually learned through repeated installation work.
A tent system is easier to install when the structure itself is designed logically, but the installation sequence is equally important. Good preparation turns many difficult jobs at height into simple jobs on the ground.
Watch the Full Outdoor Event Tent Installation
The complete installation process was recorded on site, including the aluminum frame assembly, column lifting, roof structure connection, PVC cover installation, sidewalls, and completed tent.
From Factory Test Assembly to Packing and Final Installation
Outdoor Event Tent Systems from ENO Stage
For custom event tent projects, installation is only one part of the process.
Before shipment, a tent system can also be test assembled at the factory so that the main structure, connection points, and supplied components can be checked before packing.
After customer confirmation, the structure can be dismantled, organized, packed, and loaded for shipment.
This creates a complete project process:
factory preparation -> test assembly -> inspection -> dismantling -> packing -> container loading -> customer site installation
For customers purchasing an aluminum event tent system for rental, exhibitions, festivals, corporate events, weddings, or other temporary event applications, this process provides a clearer understanding of how the structure will be assembled before it arrives on site.
ENO Stage supplies aluminum outdoor event tent systems for temporary event applications and can provide tent structures according to different project sizes and installation requirements.
If you are planning an event tent project, you can send us the required dimensions, application, site conditions, and project drawings. Our team can help review the structure and recommend a suitable tent solution.
Visitors are also welcome to view our factory production, test assembly, packing, and installation process before placing an order.
Practical Questions About Outdoor Event Tent Installation
Why should the ground tie members be prepared before the main columns are raised?
The ground tie members can be used to establish the required spacing between the main columns before lifting. Once the frame is upright, the prepared tie members and cross bracing can be connected immediately, reducing repeated measuring and making the structure easier to stabilize.
Why are control ropes kept on the frame after lifting?
The control ropes allow workers to make small positioning adjustments between two raised frames before installing the horizontal connecting members. If the spacing is too wide on one side, the appropriate rope can be used to pull the frame slightly closer and make the connection easier.
How can installers check whether the PVC roof cover has enough tension?
One practical on-site check is to press or tap the tensioned PVC surface and feel its firmness and rebound. A loose area with insufficient tension may form a low point where rainwater can collect, so the roof surface should be checked and adjusted after tensioning.